DIY Tips

Preparing Your Home for Expansion | DTC

Written by: Ainsley Lawrence
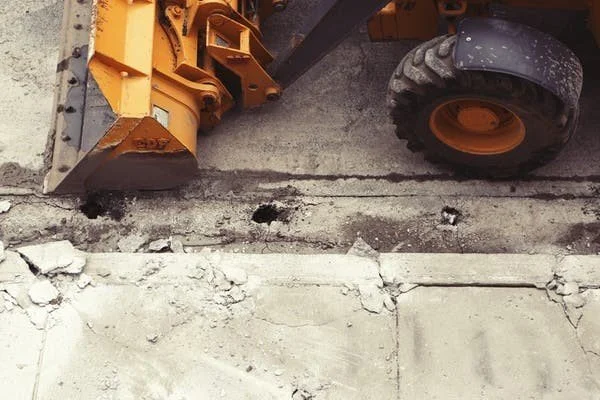
Via Pexels

Your home is one of the most valuable assets you and your family have. However, there may be times when you find the space no longer fits your needs. This doesn’t necessarily mean you need to look for a new property to purchase. Rather, undertaking a home expansion can give you the extra space you need.

That said, an expansion isn’t something you can improvise. You’ll need to take various preparatory steps before you break ground on your project. Let’s take a look at some of the key elements you’ll need to take care of.

Establish the Scope of the Project

The first preparatory step is to establish the full scope of the project. This helps you keep the project organized, on schedule, and financially viable.

Some of the aspects to focus on when defining the project’s scope should include:

●     Budget: Gain clarity on the maximum amount of money you’re willing to dedicate to the expansion project. Having a solid number and sticking to it ensures your expansion doesn’t blow your finances. Remember that your budget won’t simply be dedicated toward the materials and labor of your expansion. There will also be costs involved with permits and inspections. Additionally, you should factor in a percentage for any errors that may occur along the way.

●     Contractor consultations: It may be the case that you have the experience or expertise to take care of your expansion personally. If not, it is vital to undertake consultations with an experienced builder or contractor. They’ll be able to give you solid insights into the design options, administrative needs, costs, and potential challenges of your project. As a result, you can make more informed decisions about moving forward.

If you’re unclear whether you have a solid understanding of the scope of your project, it’s always wise to consult a professional. Even if you plan to do the construction work yourself, seeking guidance from a contractor on a purely advisory basis is still worthwhile.

Attend to the Administration

Before you get going on your expansion, there is likely to be some administration to take care of. In some instances, the contractor you’re collaborating with will take care of some of this. However, if you’re going the DIY route, you’ll have to take care of it yourself.

Some of the administration you’ll need to undertake includes:

●     Establishing the relevant building codes: There are different building codes for various home additions. These are the rules and regulations that homeowners must abide by when undertaking their projects. This applies to small additions, like sheds, as well as more involved expansions such as garages. These codes are individual to the state you live in. It’s important to research the relevant codes for your area and project so that you don’t risk fines and other penalties.

●     Seeking appropriate permits: The building codes for many projects will state that specific permits must be obtained before construction begins. Indeed, you may require different permits for various aspects of your expansion. For instance, if you have to demolish part of your property and need to park a dumpster on the street, you might require a permit for this. Be thorough in your approach and keep your permits organized in case you need to present them.

The administrative element of any expansion project can be a bit of a headache. However, admin is essential for ensuring your project maintains local construction standards. If you’re uncertain of any aspect of codes and permits, your local permit office will usually be able to provide you with guidance on what you need.

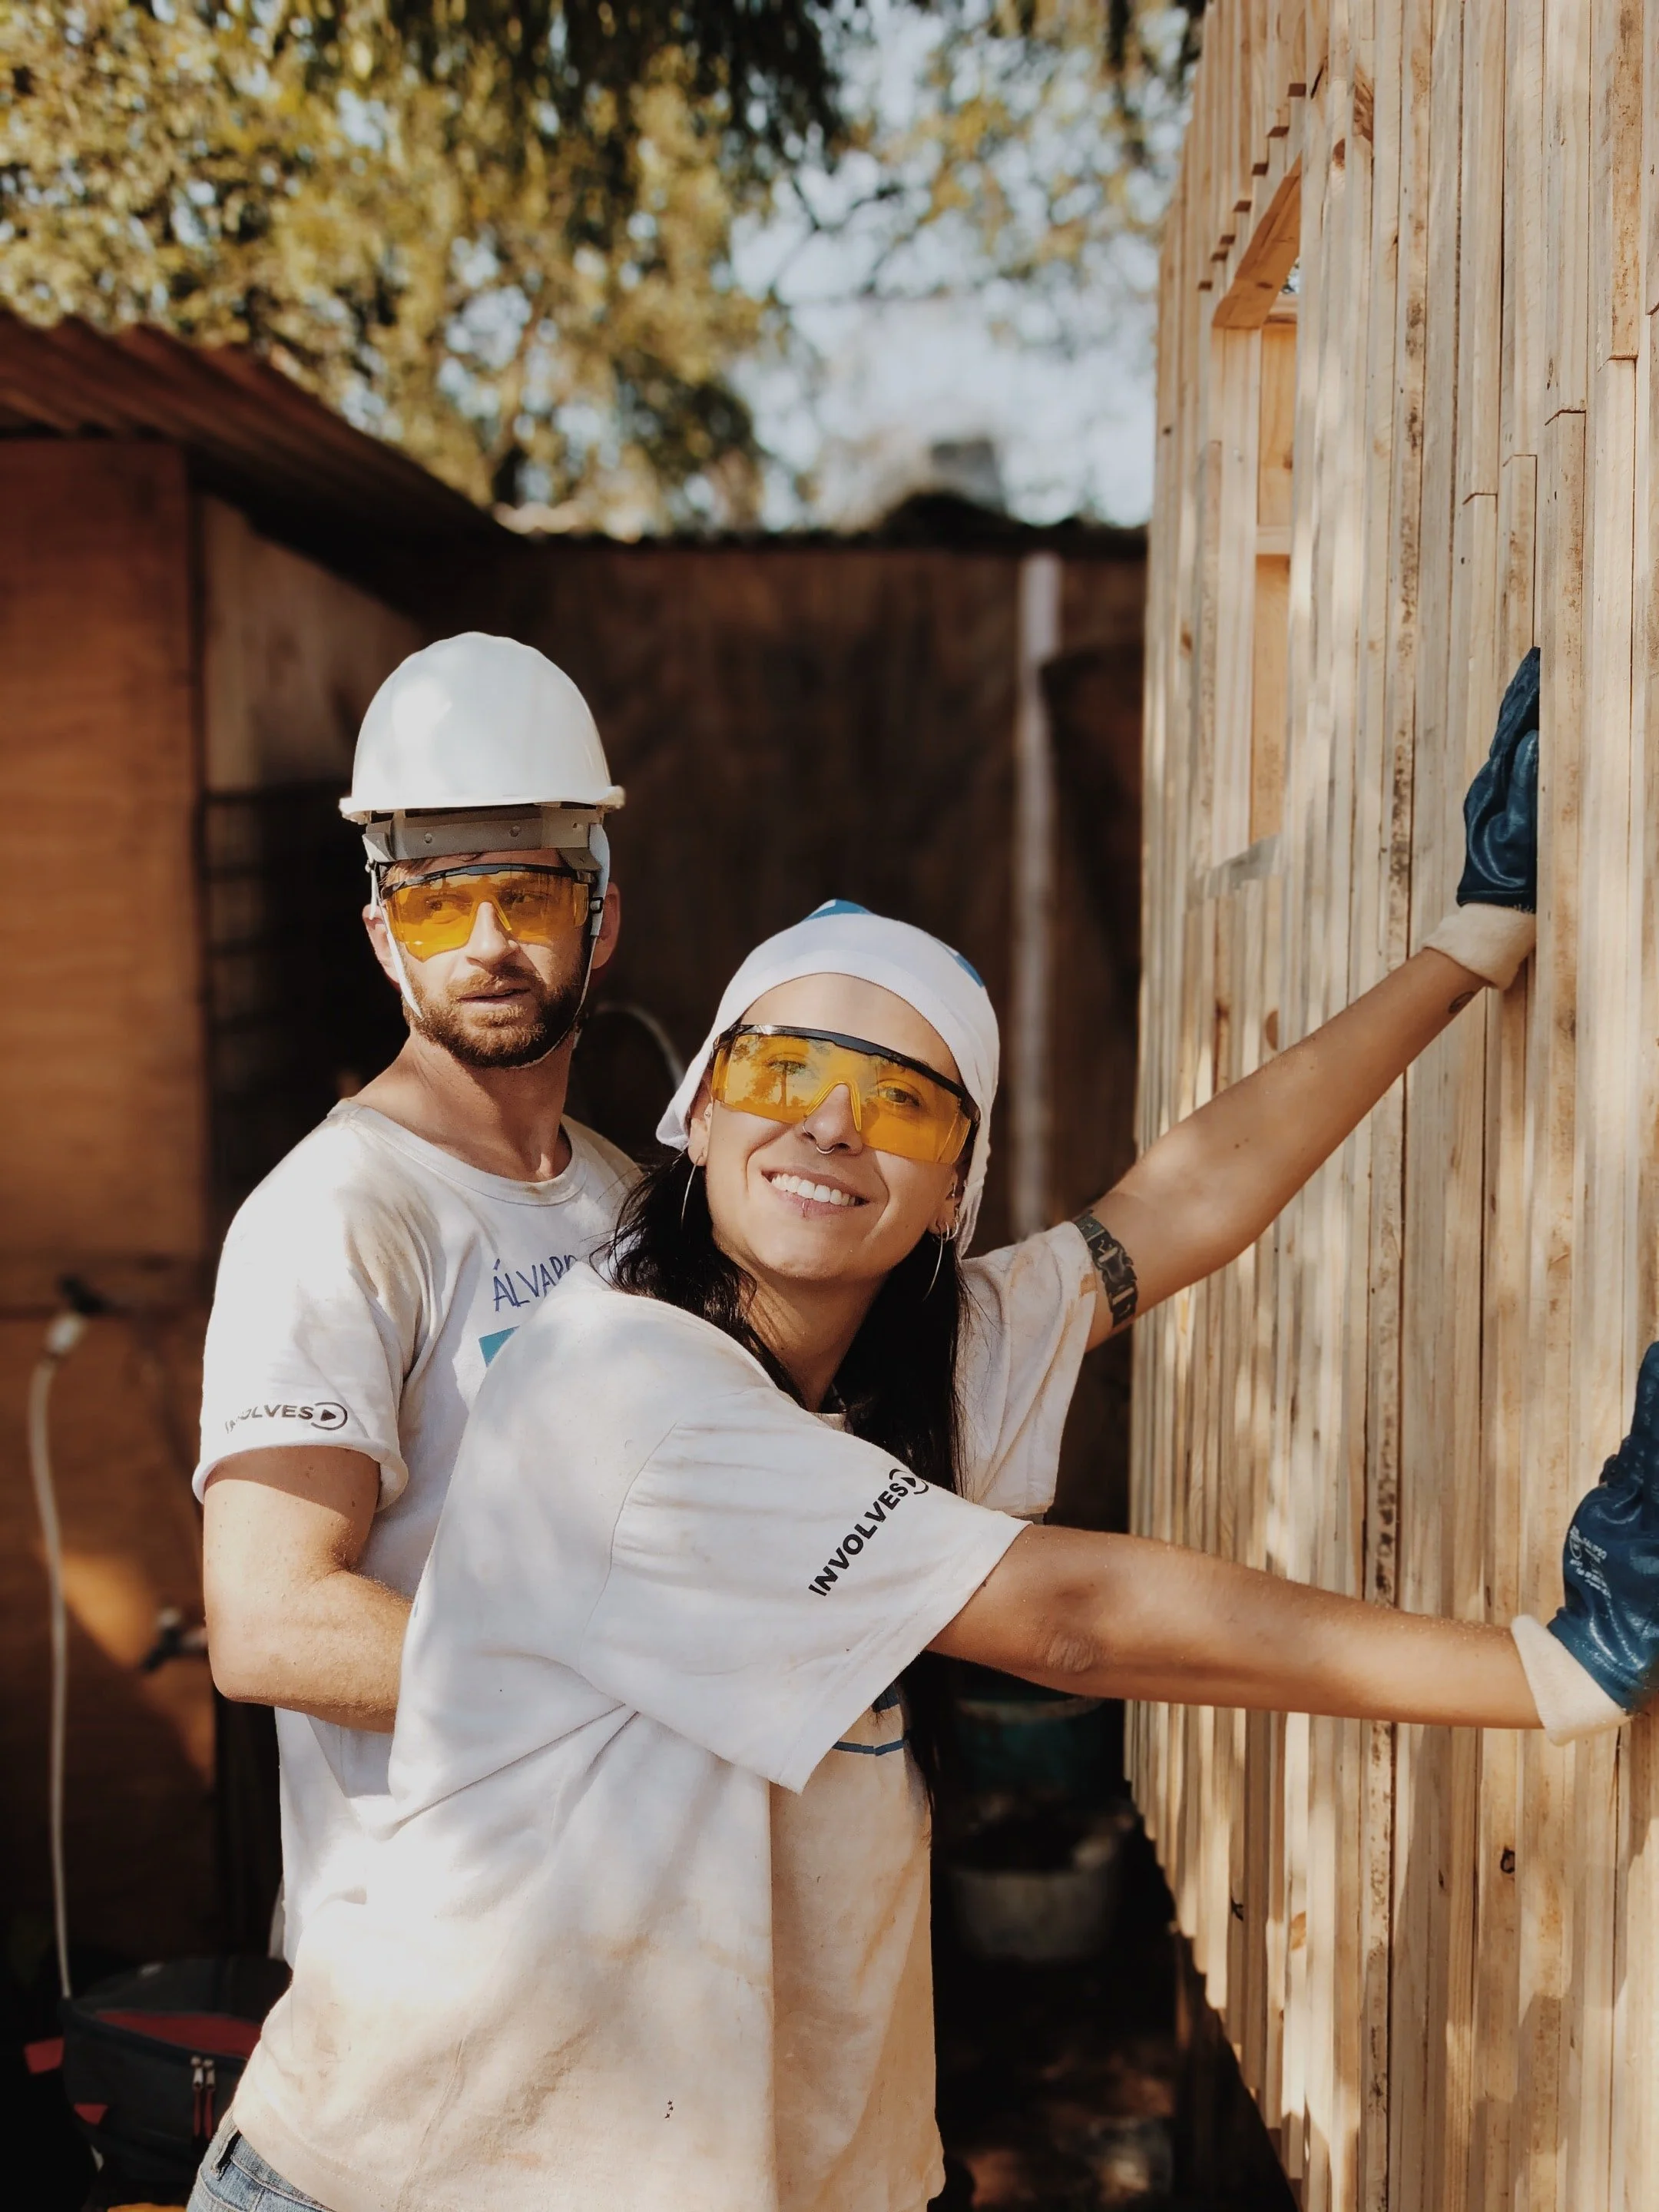
Make Safety Arrangements

Safety is paramount for any expansion project. Start by performing a risk assessment on the project. Consider the aspects of the build that could present dangers. You shouldn’t just focus on the use of tools or the potential for debris. Your family’s activities can present additional risks during construction. The more you know about the risks, the better you’re able to prepare for them.

Some considerations here include:

●     Personal protective equipment (PPE): If you’re hiring contractors, they will usually provide their own PPE. However, if you’re going the DIY route or your family is likely to be around during construction, you should invest in some safety equipment. At the most basic, this should include hard hats and dust masks. However, if you expect to be moving around in the dark during construction, high-visibility jackets may be practical, too.

●     Arrangements for children and pets: The last thing you want is to have young children and pets entering a construction site, particularly if they’re unaccompanied. It’s important to make arrangements to ensure they are supervised and kept away from hazards. If you have pets at home, it may also be sensible to set up noise reduction measures so that the noise of construction doesn’t cause undue distress.

Remember, too, that you have a responsibility to keep the general public safe during construction. You’ll need to take steps to minimize debris leaving your property. It's also sensible to take out public liability insurance to financially protect you if accidents occur.

Conclusion

Taking solid preparatory steps can help ensure your home expansion project proceeds positively. Remember, though, that there’s no “one size fits all” approach to preparation. Each project is unique in its needs, risks, and administration. Take the time to tailor your prep to suit your circumstances and, if you’re ever uncertain, consult a professional.

Tips for Moving into a Developing Neighborhood

Tips for Moving into a Developing Neighborhood

Couple sitting on a couch next to a pile of moving boxes and researching tips for moving into a developing neighborhood on a laptop. Meta Description

Embark on an exciting journey of moving into a developing neighborhood with our tips for a smooth transition and thriving community life.

Keyword:
moving into a developing neighborhood

5 Ways to Maximize Your Remodel Project

Remodeling your home is an important part of home ownership. Not only does it help keep the property safe and energy efficient, but it can also do wonders for establishing resale value. 

To this effect, not all remodeling projects are equal. Some renovations become never-ending money pits that don’t come close to recouping project costs. With this in mind, keep reading for 5 creative ideas that can help you maximize your next remodel project!

Establish Versatility

In 2023, homes are far more than a place to have dinner and decompress after work. Modern homeowners use their properties for a little bit of everything as the boundaries of the “traditional” home continue to be challenged. 

There are several ways to add versatility to a home. One way is to create open interiors that can be used for multiple purposes. This can be done by removing walls or adding large windows and doors that allow for an open floor plan. Another way to add versatility is to blend the lines between interior and exterior spaces. This can be done by adding outdoor living spaces, such as patios or decks, or by creating indoor-outdoor spaces, such as sunrooms or courtyards.

Soundproofing paint is an essential part of preventing unwanted sound transfer in versatile spaces. It can be used to reduce noise between rooms or between the inside and outside of the home. Additionally, area rugs and acoustic panels can be used to further reduce noise transfer. These products can help to create a more peaceful and comfortable environment in homes that have to wear many hats. 

Make the Renovations Low Maintenance

One of the most important things to accomplish with a home remodeling project is to make the property lower maintenance. By choosing durable materials and finishes, homeowners can reduce the amount of time and effort they spend on cleaning and upkeep.

Some of the most popular low-maintenance features for homes include:

  • Durable flooring - Laminate, vinyl, and tile flooring are all durable options that are easy to clean and maintain.

  • Nonporous countertops - Granite, quartz, and solid surface countertops are all nonporous materials that resist staining and bacteria growth.

  • Composite siding - Composite siding is a low-maintenance alternative to traditional wood siding. It is available in a variety of colors and styles, and it does not require painting or staining.

By incorporating these and other low-maintenance features into their homes, homeowners can enjoy all the benefits of a beautiful and stylish home without the hassle of constant upkeep.

Install Some Natural Accents

Adding some natural accents is one of the best ways to help your property feel more inviting to guests. To this effect, there are many ways to add natural accents to your home. 

One popular option is to use interior stone veneer. Stone veneer can be used to create a beautiful fireplace surround, or it can be used as part of an accent wall. Either way, it is a great way to add texture and warmth.

You can also add natural accents to your home by exposing the ceiling beams. This is a great way to add height and character to your space. If you have a vaulted ceiling, consider painting the beams a contrasting color to make them stand out.

Keep the Kitchen Under Control

When it comes to kitchen remodeling, many homeowners are tempted to go all out and create an elaborate space that looks like it belongs in a magazine. However, there are many reasons why modest kitchen projects are often better than elaborate ones.

First, elaborate kitchens can be more form than function. They may look beautiful, but they may not be very practical for everyday use. For example, a kitchen with an old-fashioned soda fountain may look impressive, but it will likely only be used a handful of times over the course of owning the home.

In addition, elaborate kitchens can create unnecessary work for the homeowner. A kitchen with a lot of nooks and crannies can be difficult to clean. This can also make the kitchen more costly to maintain than most homeowners care for.

For these reasons, it is often better to opt for a more modest kitchen project. A kitchen with durable flooring, nonporous countertops, and energy-efficient appliances is more likely to be functional and easy to maintain. It can still be beautiful without all the bells and whistles.

Know Your Limits As a DIYer

Home improvement and renovation shows have become increasingly popular over the past few years, and for good reason. They can be a great source of inspiration and information for homeowners who are looking to make changes to their own homes. However, it is important to remember that what you see on TV is not always as easy as it seems. In fact, some home renovation projects can be downright dangerous if you don't have the proper skills and knowledge.

One of the most important things to know when taking on a DIY project is your own limitations. If you are not comfortable working with tools or are unfamiliar with building codes, it is best to hire a professional to do the work for you. Even seemingly simple projects can go awry if you don't know what you are doing. For example, if you are not familiar with how to use self drilling drywall screws, you could end up damaging your drywall or even injuring yourself.

Before you start any DIY project, be sure to do your research and learn as much as you can about the task at hand. There are a wealth of resources available online, including blogs, websites, and YouTube videos. You can also find helpful information at your local library or home improvement store. Once you have a good understanding of the project, you can begin to gather the tools and materials you will need.

If you are ever unsure about how to proceed with a DIY project, it is always best to err on the side of caution and hire a professional. While it may cost more upfront, it could save you time, money, and heartache in the long run.

Be Intentional to Maximize Your Next Remodeling Project

Regular remodeling is an essential part of homeownership. However, not all remodeling projects are created equal when it comes to boosting safety, functionality, and resale value. For more ideas and information to help guide you through a remodeling project, check out the resources at Detroit Training Center for the latest in the construction industry!

Max Shafer is a freelance writer that loves sharing his knowledge and expertise on home improvement projects and materials. He lives in Land O’ Lakes, Florida where he enjoys spending time with his wife and working on projects in his spare time. Max’s work as a freelance writer can be found on Building Product Advisor, a new construction industry resource site.

4 Easy Ways to Improve Your DIY Skills

Do-it-yourself (DIY) projects have become increasingly popular over the years. With the rise of social media, it has become easier for us to share our creations with the world, and more and more people are embarking on DIY projects to unleash their creative juices. There is something special about creating something with your hands and seeing your vision come to life.

However, not everyone is naturally talented or skilled at DIY projects. If you want to improve your DIY skills, there are a few easy steps you can take. This blog post will share the best ways to enhance your DIY skills.

Start with a Small Project

One of the best ways to improve your DIY skills is to start small. Select a relatively simple project that won't take too much time or require a lot of materials. This could be anything from making a birdhouse, painting old furniture, or crafting jewelry from beads. Starting with small projects will allow you to experiment and learn new techniques without the stress of completing a complex task. Learning the basics this way can help you develop your skills gradually, laying the foundations for more advanced projects.


You'll also want to choose a project you're passionate about that will give you a sense of satisfaction when completed. This will boost your confidence and give you a sense of accomplishment and add to the overall design of your home or workspace.

Invest in Quality Tools and Materials

While it might be tempting to go for the cheapest option, this could cost you more in the long run. Poorly made tools can break quickly and will likely require replacing far sooner than higher-quality items. Low-quality materials can also be more difficult to work with, and the final product might not look as good or last as long.


When it comes to tools, you'll want to ensure they are designed for the project you plan to tackle. For instance, if you're working on woodwork, you'll need power tools, such as a drill, saw, and sanders.

Take Advantage of Online Tutorials and Classes

The internet has made it easier to access tutorials and classes that can help you hone your DIY skills. With it, you have access to a wealth of information on DIY projects and techniques. You can find online tutorials for anything from basic home repairs to complex woodworking projects. Additionally, you can take online classes to learn new skills and techniques.

For example, learning applied statistics as a skill can help you better understand measurements and calculations, which is crucial for many DIY projects. You can also find free or paid online classes that provide more in-depth instruction than what is available on the web. Professional crafters teach these courses and will give you detailed lessons on various techniques, from woodworking to painting and sewing.

Ask for Help

Even the most experienced DIY-ers need help from time to time. If you're stuck on a project, don't be afraid to ask for help from a friend, family member, or professional. Hiring a contractor or handyman for more complicated projects can save you time and money in the long run. Plus, you'll learn from their expertise and be better equipped to tackle similar projects.


Improving your DIY skills is a rewarding experience and doesn't have to be difficult. With the right tools, materials, and advice you can create amazing projects that will leave you with a feeling of accomplishment. Take on those ambitious projects step by step and enjoy the process.

Written By: Mian Azhar

4 Tips for Building Your Own Home

Written By: Lisa Thomas

Building your own home is exciting. You can design and create your forever home and turn it into a dream come true. Everything can be customized to your preferences and needs, but this process can be quite stressful. There are a lot of tasks, big and small, to complete before you even start building your house. You have to find a lot of professionals to help you build your home, and all that costs time and money. So, before you start, here are a few tips. 

Make a Plan

This is the most important step - creating a plan. Planning is more than just blueprints and development applications. It is also about setting a realistic time frame, planning your budget, planning the work to be done and in what order, finding contractors and so much more. Also, you have to plan the actual physical orientation of your home. Don’t wait until the last possible minute for all this. Rather, start making the plan ahead and it will help you plan all the necessary steps. Start with an outline, and slowly start adding important steps and details. Also, leave some room for adjustments for each step of the plan, because building your house is fun but it can unpredictable. 


Do the Research

Thorough research should be part of your plan, too. To create a plan you have to find all the prices, contractors, and other vital information. Start with researching where you want to build a house and check out properties in detail before you buy one. Also, look into house price trends, learn about local development processes, research contractors, materials, and so on. 

Also, you research the weather in your area, because this will affect the materials and timeframe of building the house. You can also look into insulation and why you might need it. You can easily get quotes and talk to professionals about why and how to insulate a basement or attic because these can be quite vital. 

Don’t forget that getting quotes for all types of contractors is essential. With quotes, you can easily start planning the budget and how much time you will have to wait for the house to be completed. 


Pick the Right Builder

Once the plan is in place, it’s time to choose your builder. This is a person who will be responsible for creating your home, so pick wisely. The process of choosing the right builder will depend on a number of factors:

  • The home design you want

  • The area you are building in

  • Budget

  • Service expectations

When looking for a builder, pay attention to their reputation and even ask around what people think of them. You can look at their portfolio to see if their skills match your needs, read online reviews, and check their licensing and accreditation. 

Be Realistic about the Budget

Before you start this big project, you have to know your budget. By knowing how much you can spend on building a house, there is no room for unpleasant surprises. You should also leave room in your budget for approval fees, stamp duty, planning and approval fees, settlement fees, and many other similar costs. So, when planning a budget, it is always better to have a little extra than to lack funds. 

One thing is for sure - choosing a builder will affect your budget. You want a builder that is transparent with their prices because you don’t want to finish the project and find out it is way over budget. 

There is a lot to cover when building your house. It is a fun project, but you will have to make a lot of decisions. So, make a plan, define the budget, get plenty of quotes from professionals and good luck. 

Trucker’s Guide To Preparing The Home For Extended Trips

Written by: Jordan Harris


Truck drivers are usually on the road for days or weeks at a time, sometimes even months, causing them to leave their homes unattended. Preparing your home for these long trips is vital. Having a plan for home maintenance in its various forms becomes necessary. As the old saying goes, failing to prepare is preparing to fail.


1. Get A Home Inspection

If you are purchasing a new home shortly before your extended trip, you may consider getting your home inspected to protect yourself against any existing or new potential issues that may occur while you're away. A home inspector can inform you what costly repairs may come up in the future and what you should prioritize now. If you’re just getting started, you may already have some loans out, such as if you needed to purchase a truck. Pre-existing loans might make it more difficult to take out future loans to help cover any necessary costs unearthed during your home inspection. However, you can opt to refinance your existing mortgage and choose a cash-out option. This will allow you to get a lump sum of cash that will be added into your current mortgage payment. If your credit isn’t perfectly strong,an FHA loan refinance may be the best option for you. Otherwise, a low-interest personal loan can help cover necessary repairs.


2. Prevent water damage

Water damage can be caused by plumbing issues, flooding, and leaks in your house. It’s one of those problems that you might not see until it’s too late and extensive damage has been done. With this in mind, it’s important to find the potential for water damage in your home and address it accordingly before it occurs.


●     Make sure the gutters are clean and drained properly. Check your roof for any missing shingles, cracks, and damages.

●     Check bathtubs, showers, and sinks for leaks. Seal and replace as necessary.

●     Weatherize the exterior of the home by sealing gaps in windows, doors or other openings.

●     Adjust landscape grading to ensure that water will flow away from the house. In the event of heavy rains, foundation or siding can be damaged.

●     Check for leaks and ensure sealants on the water heater are in good shape. Turn off the electric or gas supply to the heater and drain the unit if the house will be subjected to sub-freezing temperatures. Not doing so could cause hydrogen sulfide to build up in the water causing an unpleasant smell.

3. Check Your HVAC system.

Ensure the HVAC unit is in good working order and air filters don’t need to be replaced, especially if you plan on leaving it on while you are away. Make sure that the condensation drains are clear and functioning properly, and turn down the thermostat to 50 or 60 degrees. This will reduce energy consumption and ensure that the pipes don’t freeze.

4. Arrange for a House Sitter

On shorter trips, most people ask a friend or a neighbor to do simple things like take out the trash, check the mail or mow the lawn. Because truckers are usually gone for a longer period of time, it may be beneficial to hire a house sitter.  Here are some tasks you can assign your house sitter while you are away:

●     Give your house sitter the names and numbers of service and municipal companies, and if comfortable, the names of family members or friends in the event of an emergency.

●     Check and monitor the security system.

●     Park a car in the driveway.

●     If water is on, flush toilets regularly. Not doing so may allow sewer gas to enter the home.


5. Prep the kitchen

So much activity occurs in our kitchens on a daily basis that it can be easy to let certain things go under the radar when preparing for a long trip. Besides checking for leaks in the pipes under the sink or in the washing machine, there are a few other things to be aware of before you leave.

●     Remove all perishables from your refrigerator, especially things that could smell when you return. Doing so will avoid attracting pests like rodents or cockroaches. Determine if you want to leave the unit plugged or unplugged. Either way, consider adding odor absorbers like baking soda or charcoal to your refrigerator.

●     Freshen up your garbage disposal. You can do this by dropping ice cubes in and running the disposal. This will remove rust that may have accumulated from low or no usage and keep the impellers running without hindrance. You could also pour a mixture of vinegar and water into the chamber to combat odors.

●     Take out the garbage and clean the trash can. Food that may not have made it into the trash can and ended up in other places will attract bugs and other pests. Giving the kitchen trash can a good scrubbing will prevent this as well as unpleasant odors from occuring when you’re gone.

Embarking on a career as a truck driver can be exciting if you enjoy being on the road for long periods of time and sightseeing. Detroit Training Center offers programs that will help you obtain the proper CDL. As with any trip it is important to make sure that not only you are prepared but your home is prepared as well. Hopefully these tips will give you an idea of what you need to do before leaving and while you’re gone.

The Importance of Filtration in Air-Conditioning System   

The Importance of Filtration in Air-Conditioning System   

Via DelAir.com

Whether in residential or commercial establishments, the comfort and safety of everyone within the premises is your main priority. Installing air conditioning systems provides quality air and significantly reduces a room's humidity. An establishment with high humidity can lead to dust mites, mold, heatstroke, and dehydration.    


Regardless, if you already have air conditioning systems installed in your building, you need proper maintenance to ensure continued functionality and prevent respiratory diseases such as allergies. Installing access panel allows professional ac technicians to regularly check your AC whenever you notice any noticeable changes, such as temperature changes or unusual rattling coming from the device.    


However, even if you don't notice any changes in your air conditioning system, you should still regularly change the air filters to improve air quality.   


What are Air Filters?   

An air filter is a material that filters particles from the air. As with any filter, experts manufacture air filters with a porous structure through which large and coarse harmful particles cannot pass through. These filters do not let harmful allergens and pollutants enter your establishment. For this reason, air filters significantly affect your health and well-being.   


AC filters are mostly made of a fine fiberglass thread, spun on a frame or from fine paper wrapped on a cardboard frame. Here are some of the particles which an air conditioner filter can help protect you against:   


  • Pollen   

  • Mold   

  • Pollutants present in the outdoor air   

  • Dust   

  • Fur from pets   

  • Dead skin    


Importance of Regularly Changing AC Air Filters?   

We know that air filters trap dangerous particles & allergens from the air and provide fresh and clean air to travel into the establishment. Over time, these hazardous pollutant particles can gather within the filters and reduce the total volume of air passing through the air filters. Less air traveling through your AC's air filters means that you would have to turn your air conditioner's fan settings higher than the regular to achieve the same effect, and in some cases, even that might not work.   


This results in higher energy costs at the end of the month and degraded air conditioner efficiency, which you don't want. Clogged air conditioner filters can raise energy bills to 15% higher than usual. According to experts, replacing dirty filters can reduce energy consumption by 5% to 10%.   


Another disadvantage of clogged AC air filters is the recontamination of harmful particles into the air. Because of the large number of contaminants gathered in the air filter, when an air conditioner reverses airflow, some pollutants will probably make their way back into the air, resulting in even dirtier air than before.   


How Often Should You Clean Your Air Filter   

Regularly cleaning your air filters is a must, but how often you should clean them will depend on how long and much you use your air conditioners. It is best to clean air filters every two weeks, around 200-250 hours of use & get them replaced every 3-4 months. Changing air filters is crucial before the start of the hot seasons.   


Different Types of Air Filters   


Fiberglass Air Filters   

Perhaps the most common type, these filters are designed for single use only. Manufacturers create this by spreading the fiberglass fibers over a cardboard or metal frame. This fiberglass acts as a barrier to hazardous particles. According to MERV ratings, this type of air filter is on the lower end of the options, but it's a popular option among establishments and homeowners due to the low cost.   


Pleated Air Filters   

Similarly, with fiberglass filters, pleated filters utilize polyester or other cloth material to function as filters. They are usually much more capable of blocking dust flow into a room.   


The polyester cloth is set in an accordion shape, giving them a much larger surface area than flat filters. The larger surface area presents less resistance to airflow and makes for longer-lasting filters.   


Washable or Reusable Air Filters   

Manufacturers create washable filters out of cloth that can be washed and used again. These are relatively cheap filters, and experts designed these for low-intensity use. This is due to their MERV rating of 1-4, which doesn't make them suitable for high pollutant environments.   


Proper care while washing air filters is necessary, so they do not get damaged easily. It would help if you dried them before using them thoroughly, or mold and fungi can quickly grow on them.   


How to Change and Clean Air Filters   

Dirty AC filters significantly cause air conditioners not to heat or cool properly. If this is the current situation of your air conditioner, check the air filters out first, and have them cleaned or changed.   


First, you must conduct a visual inspection. Open your air conditioner and locate the filter. Hold the filter against a light source. It is still in good condition if you can see through the filter. If not, you must schedule a replacement or cleaning.   


AC filters for ducted systems are placed outside furnace units and can be quickly removed by unclipping and pulling the air filters out of their holders. Technicians install air filters within the indoor unit for ductless systems; you can easily take them out by removing them.   


You can clean air filters with a gentle blow with an air hose or a vacuum cleaner. You can wash washable air conditioner filters with running water, but dry them thoroughly before inserting them inside the AC.   


To get the best quality out of your purchase, you can consult an AC technician to know what type of air filter is suitable for your Air conditioner. At the same time, you can also ask for tips on how to use your AC efficiently to reduce the amount of maintenance and filter replacements or cleaning.    


Conclusion   

Air filters are not just a tiny part of an air conditioner. It is one of the most critical materials for providing healthy and fresh air. But, after prolonged use, you must either replace or clean your air filters to avoid spreading polluted air throughout your establishment or home. Doing so can prevent discomfort during the dry or humid season and eliminate the instances of contracting unwanted respiratory diseases.  

Written BY: REYLORD Ayop

How To Choose The Right Type Of Excavator For Your Project

Do you need to hire an excavator for a construction project? If so, it's important to choose the right type of excavator for the job. There are many different types of excavators available on the market, and each one is designed for a specific purpose. In this blog post, we will discuss the different types of excavators and help you choose the right one for your project!

1. Crawler Excavator

A crawler excavator is a type of excavator that is mounted on an undercarriage with crawler tracks. This type of excavator is typically used in construction projects where the ground is too soft or unstable to support the weight of a wheeled excavator.

Crawler excavators are also often used in mining applications because they can maneuver easily around obstacles and rough terrain. You can also read more here and get to know more about this type of excavator and its uses. Many different manufacturers produce crawler excavators, and each one offers a different set of features and options. When choosing a crawler excavator, it's important to consider the specific needs of your project. For example, if you need an excavator that can operate in tight spaces, you will want to choose one with a compact design.

2. Long Reach Excavator

A long-reach excavator is perfect for projects that require extra reach and digging depth. If you're working on a construction site with limited space, a long-reach excavator can help you get the job done quickly and efficiently. When choosing a long-reach excavator, it's important to consider the type of project you're working on. If you need extra reach for demolition or excavation, a long-reach excavator is a perfect choice. If you're looking for an excavator with more digging power, a standard or compact excavator would be a better option. Also, be sure to check the weight and size of the excavator before making your final decision.

3. Wheeled Excavator

A wheeled excavator is a type of excavator that is mounted on a set of wheels instead of crawler tracks. Wheeled excavators are typically used in construction projects where the ground is firm and stable. This type of excavator is also often used in agricultural applications because it can maneuver easily around obstacles. When choosing a wheeled excavator, it's important to consider the specific needs of your project.

For example, if you need an excavator that can operate in tight spaces, you will want to choose one with a compact design. Many different manufacturers produce wheeled excavators, and each one offers a different set of features and options.

4. Backhoe Excavator

A backhoe excavator is one of the most versatile machines on a construction site. It can be used for digging trenches, excavating foundations, and loading trucks with debris. If you're working on a large construction project, a backhoe excavator is an essential piece of equipment. Here's what you need to know about choosing the right backhoe excavator for your project. There are three main types of backhoe excavators: wheeled, tracked, and crawler.

Wheeled models are the most common type of backhoe excavator. They're easy to maneuver and have good traction on paved surfaces. Tracked models are more powerful than wheeled models and can handle rougher terrain. Crawler models are the most powerful type of backhoe excavator and are designed for use on very rough terrain.

5. Hydraulic Shovels

Hydraulic shovels are the most common type of excavator. They are used in a variety of applications, including construction, mining, and forestry. Hydraulic shovels have a bucket that is attached to a boom using a hydraulic cylinder. The bucket is operated by a joystick that controls the flow of hydraulic fluid to the cylinder. There are two main types of hydraulic shovels: wheeled and tracked. Wheeled hydraulic shovels are typically used in construction applications, while tracked hydraulic shovels are typically used in mining applications. Both types of hydraulic shovels have their advantages and disadvantages.

6. Demolition Excavator

A demolition excavator is a type of excavator that is specifically designed for the demolition industry. This type of excavator has several features that make it ideal for demolishing buildings and other structures.  One of the most important features of a demolition excavator is its ability to generate a lot of torque. This is necessary to break through concrete and other materials that are often used in construction projects.  Another feature that makes demolition excavators different from other types of excavators is their ability to operate at high speeds. This is necessary to quickly remove debris from a building or structure that is being demolished. Moreover, if you are looking for a company that offers a wide range of heavy demolition services, look no further than Bella Contracting Services where our experienced team utilizes state-of-the-art equipment to efficiently and safely handle heavy demo projects of any scale

As we saw, many different types of excavators are available on the market. Each type of excavator has its own specific set of features and benefits. When choosing an excavator for your project, it's important to consider the specific needs of your project to choose the right type of excavator. Thanks for reading! We hope this article was helpful.

Simple DIY Brick Repair Tips

Written By: Jordan Harris

Historically, bricks have been considered a durable and reliable building material. They’re generally resistant to pests like termites, ants, and squirrels, and don’t succumb to rot. This, however, doesn’t prevent them from becoming cracked or damaged. Assessing any damage and repairing affected bricks or mortar are both relatively easy with the right know-how. Keep reading for some tips to complete your own brickwork repairs. 

DAMAGE ASSESSMENT

The causes for cracking in bricks range from something as simple as age or could reflect a foundational or structural issue caused by movement, soil erosion or weather damage. You’ll first want to take a close look at the area in question to see if you can find a suitable, cost-effective solution or if you need to hire a professional. Two of the most common solutions that you can do yourself to repair cracked or broken bricks are mortar repair or brick replacement. 

WHAT YOU’LL NEED

  • Eye Protection

  • Leather or Nitrile Work Gloves

  • Plastic Buckets

  • Sponges

  • Shop Vacuum

  • Pointer Tool

  • Jointer Tool

  • Matching Bricks

  • Mortar Mix

  • Mason’s Hammer

  • Chisel

BRICK REPLACEMENT

Before you begin, study the area you’ll be working on and take note of the joints between the bricks. In order to replicate their color and shape, you may need special masonry tools. Using a hammer and chisel, break the damaged brick into manageable pieces and remove them. 

Chisel out the old mortar and use a shop vacuum and brush to clear the opening of any dust or debris. Using one of the buckets, mix fresh mortar with water until it reaches an oatmeal-like consistency. 

After that, you can use a pointer or masonry trowel to spread the mortar on the bottom and sides of the opening. Moisten the replacement brick and spread mortar on its top and sides, then insert the brick into the opening, making sure that it’s flush with the other bricks in the wall and the joints are full to the face. Add more mortar if necessary. 

Using the jointer tool, adjust the joints so that they match the others on the wall. Once it’s close to dry, brush away any leftover mortar from the face of the bricks. Be careful not to disturb the joints that were already tooled.

Lastly, keep the new repair moist by spraying it with water over the course of three days. Cover the area with a plastic sheet if needed in order to help the repair retain moisture. This will allow the mortar to cure and harden correctly.

MORTAR REPAIR

The first few steps to mortar repair are similar to brick replacement. However, instead of clearing out the openings, you’re clearing out the joints of old mortar. This step may require more than a hammer and chisel as mortar rarely comes out easily. In this case, you can also use a rotary hammer and a tuck-point grinder on the vertical and horizontal joints, respectively.

When mixing the fresh mortar you’ll want to make sure that color is consistent with the mortar on the wall. You may need to experiment with this in order to get the right match.

Once this is done you can fill the joints with new mortar using a pointer tool. Depending on the size of the joints, you may need different pointer tools for this. As with brick replacement, you’ll want to make sure that the joints are filled to the face of the brick wall to prevent water and other elements from getting in and causing damage.

In order to make simple repairs for cracks in the bricks themselves, wait until after the joints are repaired and then try to find a dyed mortar that matches the lightest colored brick or the majority of the bricks on the wall. Once the crack is filled, use a trowel to spread out the excess mortar.

WHEN TO CALL A PROFESSIONAL 

If you’re working with a load-bearing brick wall, great care should be taken to avoid serious accidents or injuries. Minor repairs to a few bricks or patches with mortar can be made, but any project that requires you to work higher up on a wall or with a chimney is better left to a professional masonry contractor. 

If you’re worried about the affordability of hiring a professional, or your home improvement budget needs to be allocated elsewhere, a fixed rate HELOC can provide you with the necessary funds for any structural or foundational changes your house needs. Borrowed against your home’s equity, you can take out as much or as little money as the project requires. Because making a mistake in brickwork will be highly noticeable and potentially difficult to fix, it may be best to opt-out of DIY and leave things to a professional.

CONCLUSION

Working with bricks can be tricky if you don’t know what you’re doing. Luckily, with minor cracks and damage to mortar, there are relatively easy fixes. These tips should help you get started in making simple repairs to cracks, bricks, and mortar, but remember to take care when working with older homes and contact a professional as needed. 

Hidden Health Risks During DIYs by Stacy G.

Could Asbestos Be Hiding in Your Home?

As you sit watching your favorite television show or dream up your next big home improvement project, have you ever wondered if there are toxic health dangers hiding in your home? Probably not, but if you are planning on doing a little renovation work or a home remodeling project on your own, it is important to know the dangers of asbestos exposure before you get started.


What is Asbestos?


Asbestos is a group of six naturally occurring silicate minerals made up of thin, microscopic fibers. Asbestos offers heat and chemical resistance, fireproofing, and strength. Because of these qualities, it was a popular additive to a variety of products before its dangers became known. Individuals exposed to asbestos face health risks including cancer and other illnesses.


Asbestos is found in naturally occurring deposits around the world. Its deposits are located across the United States, mainly in the western U.S. and eastern coastal states. Although asbestos mining was prominent throughout the mid to late 1900s, its use in new products was ultimately banned by the United States Environmental Protection Agency in 1989. This is an important time frame to note if you are working around materials that may have been in place before then.


Where is Asbestos Typically Found?


Because of its fiber strength and heat resistance, asbestos was used in a variety of building construction materials for its fire retardancy and insulation capabilities. Asbestos has also been used in a wide range of manufactured goods—mostly in building materials—such as floor and ceiling tiles, paper products, asbestos cement products, heat-resistant fabrics, gaskets, packaging, coats, and friction products (e.g. automobile clutch, brake, and transmission parts).


Use caution when working around any of the following areas in your home:


●     Attic and wall insulation;

●     Siding and roofing shingles;

●     Walls and floors around wood-burning stoves protected with asbestos paper, millboard, or cement sheets;

●     Vinyl floor tiles and the backing on vinyl sheet flooring/adhesives;

●     Textured paint and patching compounds used on walls and ceilings;

●     Hot water and steam pipes coated with asbestos material or covered with an asbestos blanket and/or tape; and

●     Oil and coal furnaces and door gaskets with asbestos insulation.


Safety Precautions to Reduce Asbestos Exposure


No amount of asbestos is ever considered safe. Once it is disturbed, it becomes dangerous due to its ability to break down into microscopic fibers and become airborne. Asbestos fibers can linger for days, making them easy to breathe in. Once these fibers are inhaled, they can travel deep into a person’s lungs where they may eventually lodge in the lung tissue. Once it is in the lung tissue, asbestos fibers can cause several serious diseases, including various cancers. For example, peritoneal mesothelioma cancer is caused by inhaling or ingesting asbestos fibers. Unfortunately, mesothelioma cancers take a long time to show up in the system and someone may not receive a diagnosis until years after initial asbestos exposure. This is why it’s critical to take the necessary safety precautions when working with asbestos.


Always wear required protective clothing such as coveralls or similar full-body clothing, gloves, head coverings, and foot coverings when working near areas where asbestos may be present. Goggles, face shields, and other protective equipment are also necessary.


Follow these safety measures to reduce your risk of asbestos exposure:


●     Do have major repair and removal done by people trained and qualified in asbestos removal. It is highly recommended that sampling and even minor repairs still be handled by asbestos professionals.

●     Do take every precaution to avoid disrupting asbestos material.

●     Do keep activities to a minimum in any areas having damaged material that may contain asbestos.

●     Do not dust, sweep, or vacuum debris that may contain asbestos.

●     Do not saw, sand, scrape, or drill holes in asbestos materials.

●     Do not brush or try to level asbestos flooring or its backing. When asbestos flooring needs to be replaced, install new floor covering over it.

●     Do not use abrasive pads or brushes on power strippers to strip wax from asbestos flooring. Never use a power stripper on a dry floor.

●     Do not track material that could contain asbestos through the house. If you cannot avoid walking through the area, have it cleaned with a wet mop. If the material is from a damaged area—or if a large area must be cleaned—call an asbestos professional.


Hire a Professional


Unless it is labeled, you will not know whether a material contains asbestos just by looking at it. When starting a new home improvement or renovation project, treat the material as if it contains asbestos by following the above guidelines or contact an asbestos professional in your area to have it sampled and analyzed. Asbestos professionals are trained in handling asbestos material.


The type of professional will depend on the type of product and what needs to be done to correct the problem. You may hire a general asbestos contractor or, in some cases, an asbestos abatement professional trained to handle specific products and remove it for you. Abatement professionals are highly trained to follow federal and state laws. The United States Environmental Protection Agency (EPA) requires abatement specialists to receive thorough training and accreditation.


Certified asbestos professionals can conduct home inspections, take samples of suspected material, assess its condition, and advise what corrections are needed and who is qualified to make those corrections. A professional abatement contractor can then repair and/or properly remove asbestos materials.


Home improvement projects are a fun and rewarding investment, but it also comes with risks. Knowing the hazards before starting your next project ensures that you stay safe and healthy. As tempting as it may be to want to start right away, always ask yourself if you are sure the project is safe to tackle on your own or should you be calling a professional for help and guidance.


** If you are a contractor in Michigan and interested in becoming a certified and licensed asbestos abatement professional, Detroit Training Center can help you. You will receive the highest quality instruction with the most hands-on training for obtaining your certificate for licensing, along with the 8-hour refresher course that is required once a year to maintain licensure.

Additional Resorce: Asbestos.Com